The glow of the Check Engine Light (CEL) on your dashboard can be a source of anxiety for any car owner. While it signals a problem, it doesn’t tell you what that problem is directly. This is where On-Board Diagnostics, Second Generation, or OBD2, comes into play. Mandated for all light-duty vehicles sold in the United States since 1996, the OBD2 system is your vehicle’s self-diagnostic brain, constantly monitoring various systems for proper operation.
Understanding how to read and interpret OBD2 codes empowers you to diagnose potential issues, make informed decisions about repairs, and even save money on unnecessary trips to the mechanic. This guide will walk you through the process, from connecting a scanner to decoding the cryptic alphanumeric fault codes, helping you become a more knowledgeable and confident vehicle owner.
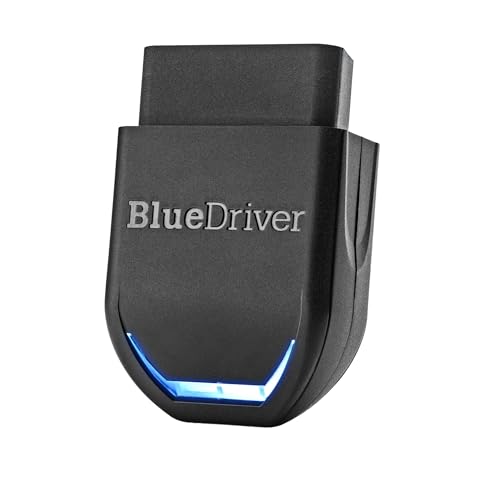
BlueDriver Bluetooth Pro OBD2 Scan Tool
What is OBD2 and Why Does It Matter?
OBD2 is a standardized system that allows external equipment to communicate with your vehicle’s internal computer (Engine Control Unit or ECU, and other modules). Its primary purpose, as established by the U.S. Environmental Protection Agency (EPA), is to monitor emission-related components and ensure they are functioning within specified parameters. When a sensor detects an anomaly or a component fails, the system stores a Diagnostic Trouble Code (DTC) and illuminates the Malfunction Indicator Lamp (MIL), commonly known as the Check Engine Light.
Before OBD2, diagnostic systems were proprietary, varying significantly between manufacturers. The standardization brought by OBD2 means that any compliant scanner can read codes from any OBD2-equipped vehicle, simplifying diagnostics across the automotive industry. This system is crucial not only for environmental compliance but also for identifying issues that could impact your vehicle’s performance, fuel efficiency, and safety.
Locating Your OBD2 Port and Choosing a Scanner
To read codes, you first need to locate your vehicle’s OBD2 diagnostic port. This is a 16-pin connector, typically found within two feet of the steering wheel. The most common locations include:
- Under the dashboard on the driver’s side.
- Under the dash near the center console.
- Behind an ashtray or coin holder.
- In the glove compartment (less common).
Once you’ve found the port, you’ll need an OBD2 scanner. These tools vary widely in features and price:
- Basic Code Readers: These entry-level devices can read and clear DTCs, and sometimes display live data. They are affordable and great for simple diagnostics.
- Mid-Range Scan Tools: Offer more advanced features like live data streaming, freeze frame data (snapshots of engine conditions when a code was set), I/M readiness status, and sometimes ABS/airbag code reading.
- Professional Diagnostic Tools: Used by mechanics, these offer extensive capabilities, including bidirectional control, module programming, and manufacturer-specific diagnostics.
- Smartphone Apps with Bluetooth/Wi-Fi Adapters: These adapters plug into the OBD2 port and communicate with a smartphone app, offering many features of mid-range scanners at a lower cost.
The Process: Connecting and Retrieving Codes
Reading your car’s OBD2 codes is a straightforward process:
- Turn off the engine and ignition: Ensure the vehicle is off before connecting the scanner.
- Locate the OBD2 port: As mentioned, typically under the driver’s side dash.
- Plug in the scanner: Firmly connect the scanner’s cable to the OBD2 port.
- Turn the ignition to the ‘ON’ position: Do not start the engine unless the scanner’s instructions specify otherwise for live data. The dashboard lights should illuminate.
- Power on the scanner: Most scanners will power up automatically once connected.
- Navigate the menu: Follow the scanner’s on-screen prompts. You’ll usually find options like ‘Read Codes,’ ‘DTC Lookup,’ or ‘Trouble Codes.’
- Retrieve codes: The scanner will communicate with your vehicle’s computer and display any stored Diagnostic Trouble Codes. It may show ‘Pending’ codes (issues detected but not yet confirmed) and ‘Confirmed’ codes (issues confirmed over multiple driving cycles that illuminate the CEL).
- Record the codes: Write down all codes displayed, as well as any accompanying descriptions, before proceeding.
Decoding OBD2 Codes: The Standardized Structure
OBD2 codes follow a standardized, five-character alphanumeric format established by SAE International (Society of Automotive Engineers), specifically detailed in standards like SAE J2012. Understanding this structure is key to interpreting the codes:
- First Character (System Type): Indicates the general system area where the fault occurred.
- P (Powertrain): Most common. Relates to the engine, transmission, and associated emissions systems.
- B (Body): Relates to comfort, convenience, and safety systems (e.g., airbags, power windows, central locking).
- C (Chassis): Relates to chassis systems (e.g., ABS, traction control, steering).
- U (Network): Relates to communication issues between vehicle modules.
- Second Character (Code Type): Indicates if the code is generic or manufacturer-specific.
- 0 (Generic): A common code defined by SAE, applicable across all manufacturers.
- 1 (Manufacturer Specific): A code defined by the vehicle manufacturer, often requiring specialized knowledge or tools for precise interpretation.
- 2 (Generic): Also a generic code, often related to fuel and air metering.
- 3 (Manufacturer Specific): Another manufacturer-specific code.
- Third Character (System Sub-Group): Specifies a more particular system within the general category. For ‘P’ codes, common sub-groups include:
- 1 or 2: Fuel and air metering
- 3: Ignition system or misfire
- 4: Auxiliary emission controls
- 5: Vehicle speed, idle control, and auxiliary inputs
- 6: Computer and auxiliary outputs
- 7 or 8: Transmission
- Fourth and Fifth Characters (Specific Fault Index): These two digits provide the precise fault description within the specified system sub-group. For example, P0301 indicates a Cylinder 1 Misfire.
Always reference a reliable OBD2 code database or your vehicle’s service manual for the most accurate and detailed description of any specific code.
Interpreting Codes and Next Steps
Simply reading a code is only the first step. Proper interpretation and subsequent action are crucial:
- Do Not Clear Codes Immediately: Clearing codes erases the ‘freeze frame data’ – a snapshot of engine conditions (speed, load, temperature, etc.) at the moment the fault occurred. This data is invaluable for diagnosis.
- Research the Code: Use the full code (e.g., P0420) to research online, consult a repair manual, or use your scanner’s built-in lookup function. Understand what the code *means* and common causes.
- Consider Context: Think about when the Check Engine Light came on. Was it after a specific event, like filling up with gas, hitting a bump, or after a recent repair? This context can provide clues.
- Perform Visual Inspection: Often, a code points to a sensor or component that might be visibly damaged, disconnected, or covered in corrosion. Check wires, hoses, and connectors related to the code’s system.
- Look for Related Codes: Sometimes, one fault can trigger several codes. For example, a bad oxygen sensor (O2 sensor) might cause codes for catalytic converter inefficiency. Prioritize the ‘root’ cause.
- When to Seek Professional Help: If the code indicates a serious issue (e.g., flashing CEL indicating a severe misfire that could damage the catalytic converter), or if you’re uncomfortable performing diagnostics yourself, it’s best to consult a certified mechanic. They have advanced tools and expertise to pinpoint complex problems.
- Clearing Codes (After Repair): Once you’ve diagnosed and repaired the issue, you can use your scanner to clear the codes. This will turn off the Check Engine Light. If the problem persists, the light will return.
Beyond Basic Codes: Live Data and Readiness Monitors
While DTCs tell you what system has a fault, ‘live data’ can provide real-time insights into what various sensors and components are doing. Most mid-range and advanced OBD2 scanners can display parameters like engine RPM, coolant temperature, vehicle speed, oxygen sensor voltages, fuel trim values, and more. Monitoring these values as you drive can help confirm a diagnosis or identify intermittent issues that don’t always trigger a code.
‘I/M Readiness Monitors’ (Inspection/Maintenance Readiness) are another important feature. These are self-tests performed by your vehicle’s computer on various emissions-related systems. For a vehicle to pass an emissions inspection, all applicable monitors must be ‘complete’ or ‘ready.’ If you’ve recently cleared codes, these monitors may be reset and require a specific ‘drive cycle’ (a sequence of driving conditions) to complete again. Your scanner can tell you which monitors are ready and which are not, preventing a failed emissions test.
Frequently Asked Questions
Is it okay to drive with a Check Engine Light on?
It depends. A solid Check Engine Light often indicates a non-critical issue, like a loose gas cap or a minor emissions fault, and you can usually drive for a short period. However, a flashing Check Engine Light is a serious warning, typically indicating a severe engine misfire that could rapidly damage your catalytic converter. In this case, you should pull over safely and have the vehicle towed or serviced immediately to prevent costly damage. It’s always best to get the code read as soon as possible to understand the severity of the issue.
Can I clear OBD2 codes myself?
Yes, most OBD2 scanners have a function to clear codes. However, it’s generally not recommended to clear codes without first diagnosing and ideally repairing the underlying issue. Clearing a code will turn off the Check Engine Light and erase valuable ‘freeze frame data’ that a mechanic might need. If the problem isn’t fixed, the code will simply reappear, and the light will come back on. Clearing codes can also reset your emissions readiness monitors, which might cause an issue if your vehicle is due for an inspection.
What's the difference between a pending and a confirmed code?
A ‘pending’ code indicates that the vehicle’s computer has detected an issue once, but it hasn’t yet confirmed it as a persistent problem. If the issue recurs over a specified number of drive cycles, the pending code becomes a ‘confirmed’ code, and the Check Engine Light illuminates. If the issue doesn’t recur, the pending code may eventually clear itself. A ‘confirmed’ code signifies a consistent fault that requires attention.
Where is the OBD2 port usually located?
The OBD2 port is typically located within two feet of the steering wheel on the driver’s side of the vehicle. The most common location is under the dashboard, often tucked away near the steering column or above the pedals. In some vehicles, it might be behind a small cover or in the center console area. All vehicles sold in the US since 1996 are legally required to have an easily accessible OBD2 port.
Do all cars have OBD2?
In the United States, all passenger cars, light-duty trucks, and SUVs sold since January 1, 1996, are required to be equipped with OBD2. This mandate was primarily driven by the EPA to monitor emissions systems. Heavy-duty vehicles and motorcycles have different diagnostic standards, though many newer models incorporate similar principles. If your vehicle is older than 1996, it will have an earlier, non-standardized OBD1 system, which requires a specific scanner for that vehicle’s make and model.
The Bottom Line
Reading OBD2 codes is a fundamental skill for any modern car owner. It provides a direct line of communication with your vehicle’s sophisticated diagnostic system, transforming a mysterious warning light into actionable information. By understanding the standardized code structure, utilizing an appropriate scanner, and following a logical diagnostic process, you can confidently identify potential problems, contribute to more efficient repairs, and ultimately extend the life of your vehicle. Empower yourself with this knowledge, and take control of your automotive maintenance journey.